
A truss rod is a steel rod that runs inside the neck of a guitar (under the fingerboard), and is used to stabilize the neck, counteracting the tension of the strings. The counter-tension it provides can typically be adjusted, which can have a large effect on the neck relief, intonation, and overall string action.
With this guide we will be taking a look at all of the points that you should know about truss rods, such as how (and when) it should be adjusted along with some other general information and common questions.
However, if you’re in a hurry, here are some key takeaways about truss rods:
- Not all guitars have truss rods
- Your guitar can have a single-action or dual-action truss rod
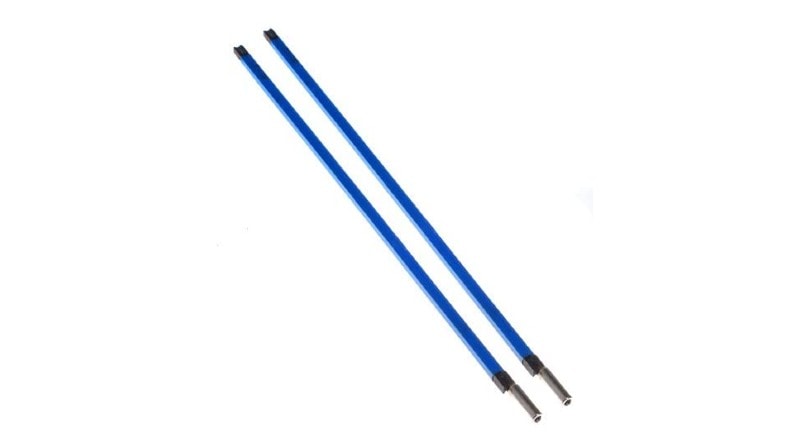
- You typically use a hex wrench to adjust your truss rod
- Truss rod adjustments can be done at home
- If your truss rod gets broken, it is difficult but not impossible to replace
Contents
What makes a truss rod work?
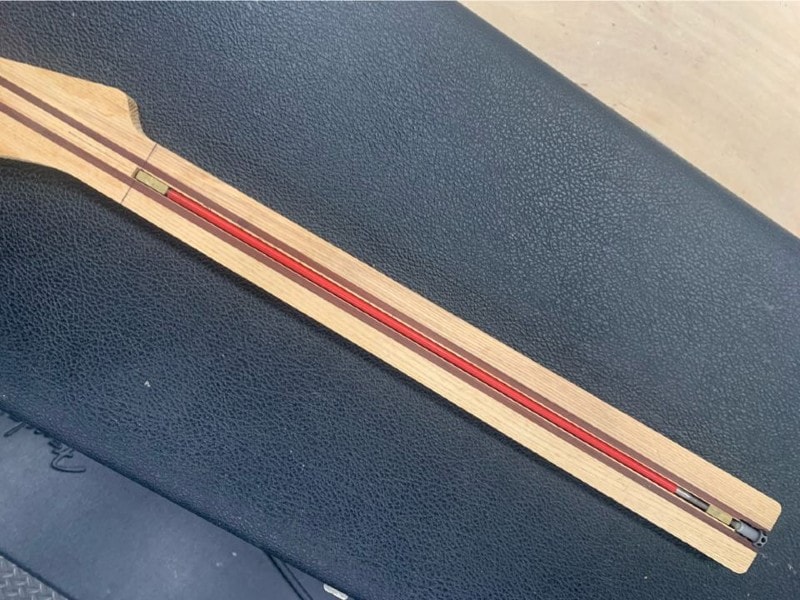
A truss rod helps to keep your guitar’s neck straight by providing counter tension against the pull created by the strings. In its simplest form (also called ‘single action’), the rod has a fixed nut at one end and an adjustable nut at the other end. As the nut is tightened, the straightness of the rod will develop a slight curvature..
Why is this important? Picture how a guitar neck may be with all of the strings tuned to full pitch. That’s a lot of tension for a piece of wood to handle, and they typically will bow up (that is, the headstock will slightly raise up). By tightening (or loosening) the adjustable nut, the curvature will help to minimize this bowing effect.
Along with single action truss rods, some guitars have dual action ones instead. Dual action rods are the ideal solution for necks that exhibit a back bow condition. Back bow is a condition where the straightness of the neck is higher in the middle, and the most typical cause is due to actual warping.
So what can you do if you have a back bow condition, but your guitar only has a single action truss rod? Unfortunately, this may be a situation where you would have to consult a pro or a good luthier.
Does your guitar even have a truss rod?
Due to the nature of what a truss rod does for your guitar, it’s very uncommon to find a guitar of decent quality that does not have one. But there still are some guitars that do not come with them at all.
Certain brands of electric guitars may not have a truss rod due to the materials that are used for the neck. These models use some other material to help reinforce the wood, and they typically do not have any adjustment points.
Many classical guitars do not have truss rods at all. Since the string tension that is created by nylon strings is so much lower than that of steel, it’s typically not enough to overcome the natural strength of the neck wood (usually mahogany or maple).
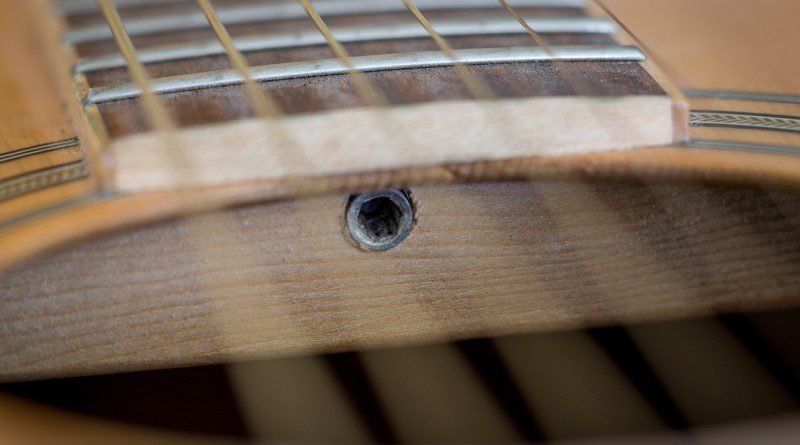
You can tell if your electric guitar has a truss rod (again, 99% or more of them do) by looking at the headstock or at the base of the neck. With guitars that have truss rod access (for adjustments) on the headstock, you’ll see either a hole in the neck near the nut (as with a Fender Stratocaster).
You may see a small cover plate that covers the hole as well (as found on a Gibson Les Paul). Some electric guitars have the truss rod access at the bottom of the neck where it meets the body (a Wolfgang is a good example).
The same is true for acoustic guitars as well. Most will have the cover plate on the headstock, while others may have the access point at the base of the neck (accessed through the soundhole itself).
What effects does a truss rod have on my guitar’s playability?
The effect that a truss rod can have on how well your guitar plays absolutely cannot be overstated. There are four major factors that a property adjusted truss rod can influence:
- Neck relief
- String action
- Fret buzz
- Intonation
Neck relief
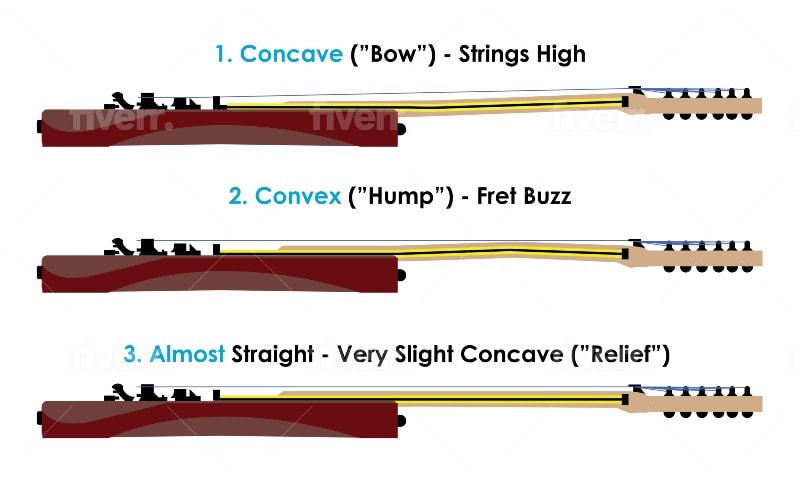
Neck relief is a measurement of how straight and true a guitar neck is (a neck with a large up bow will have excessive relief). How much – or how little – relief you have can have a large impact on the other playbility factors, so it’s extremely important to have it adjusted correctly for your needs.
String action
String action is nothing more than how high off the fretboard your strings are. If your guitar’s neck has too much relief, then the amount of upbow will naturally make the strings higher from the fretboard. Typically a low amount of relief (therefore a straighter neck) will allow for lower action.
It’s important to note that adjusting the truss rod alone isn’t all it takes to affect a guitar’s action. A combination of adjustments with the truss rod and also with the bridge is what it takes to get it where it feels best. That being said, you may struggle getting where you want to be without having your relief properly set.
For more on guitar action, check out our full guide.
Fret buzz
Low string action can often mean one very common annoyance – fret buzz. For this reason it is often recommended that there is always at least a minimal amount of neck relief as this will help counteract it, particularly on the lower frets.
If you get fret buzz higher up the neck, then reducing the amount of relief may correct the problem (along with, again, some minor tweaks at the bridge).
Intonation
Intonation is how well your strings stay in tune as you go higher up the fretboard. The main adjustment point is found at the bridge saddle. To get the intonation right for a particular string, you move the saddle forward or backward (therefore changing the overall string length) where the note at the 12th fret is a perfect octave of the string played open.
So what would a truss rod have to do with intonation? Plenty!
As we stated earlier, too much neck relief can lead to higher string action. That means that you have to press down farther to fret a note than you would with lower action. Believe it or not, just that little bit of distance means you are adding a slight amount of extra tension, which can make the fretted note be out of tune.
For more on intonation, check out our full guide.
How to adjust a truss rod
The thought of making a truss rod adjustment by yourself may scare a lot of guitarists, but it’s really a fairly easy thing to do. As long as you keep a few simple tips and recommendations in mind, you should be able to do it without any issues.
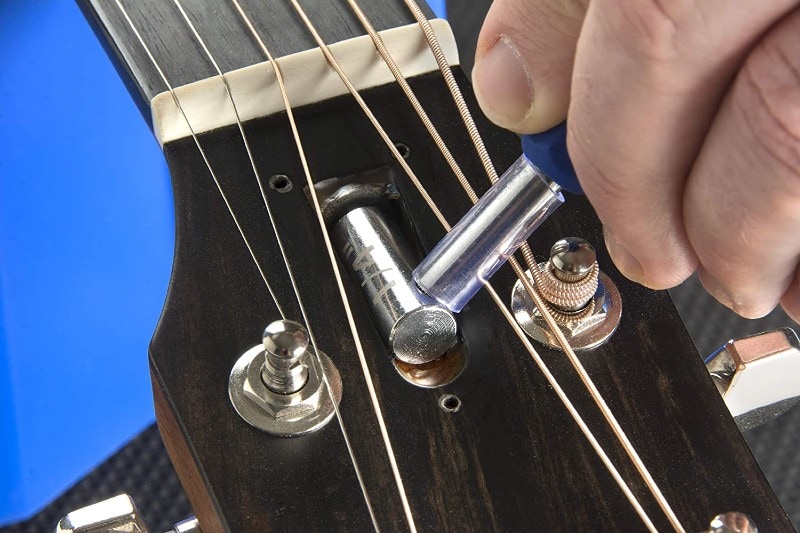
Use the right tools
To start out with, make sure you are using the right tools for the job. Exactly what you will need to adjust your truss rod will depend on the construction of the rod itself. Most use a standard hex wrench (inserted at the end) while others may use a Phillips screwdriver. You may also find truss rods that are adjusted at the base of the neck via a small wheel where you insert a wrench to gain leverage, then turn to adjust as needed. We have a whole article on guitar setup kits that typically include wrenches for adjusting your truss rod.
Measure your neck relief
Once you have your tools in place, the next step is to determine the amount of neck relief you have. To make this measurement, place a capo on the first fret (this takes any influence of the nut slot depths out of the equation). Then fret the low E string at the fret where the neck joins the body. You can then check the amount of relief by placing a feeler gage between the bottom of the string and the top of the 8th fret.
The recommended amount of neck relief can vary based on the type of guitar and a player’s particular preferences (for more on different types of guitar, see our full guide). For example, Fender’s specification for proper neck relief is 0.010”, which is typically a good target point for most guitars.
Determine which way to make the adjustment
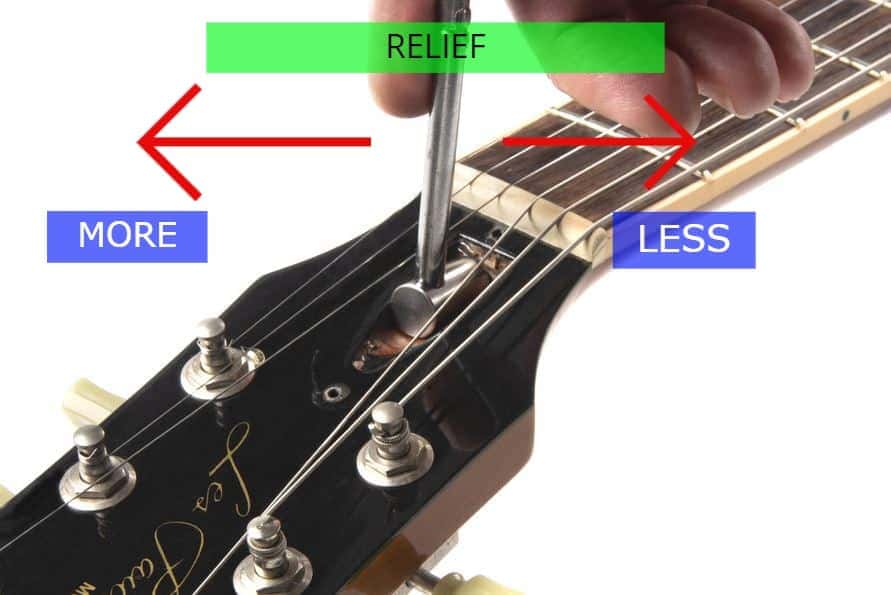
If you find that your relief isn’t where it needs to be, then adjusting your truss rod follows a fairly standard process. Find the access point for the adjustable nut and turn it in the following manner: going clockwise tightens the rod, which will make the neck straighter (and therefore reduce the amount of relief), and counterclockwise loosens it to allow for a bit of upbow.
A quick note about tightening the rod: since you will be taking the bow out of the neck by making it straighter, we’d recommend loosening the strings a bit. Starting out with them tuned to pitch will mean you will be increasing their tension; this may make the adjustment not take hold as well as it should. On the flip side, if you are loosening the rod then this isn’t a concern as the string tension will be reduced.
Use minimal adjustments and let it settle in
It’s very important to not adjust too much at one time, however. A trick to adjusting your truss rod correctly is to do it in small increments of around an ⅛ to a ¼ turn at a time. A common recommendation is to let the neck settle in after an adjustment because the effects may take some time to get the full effect of the change – just remember to tune it to proper pitch first.
Take care to not force an adjustment
Another pointer is to not ever force an adjustment, no matter which direction you are turning. If it starts to turn too tight, you may severely damage the rod – and you’ll then have a much bigger problem to deal with. A broken truss rod will most certainly require the attention of a professional repairman, as the fretboard would have to be removed to gain access to the rod itself.
Check your results and readjust as necessary
Once all of these steps are complete, then check your relief again using the capo technique. We should note that patience is definitely a virtue when getting your relief properly set, as it may take a few go-arounds to get it right where you want.
Truss Rod Questions
What are the benefits of periodic truss rod adjustments
One great thing about having the ability to adjust your truss rod is the fact that a guitar is a relatively fragile instrument, due to it being constructed from a natural material like wood. That means it is susceptible to environmental and seasonal changes. It isn’t unheard of at all to have to perform minor setup tweaks during the course of the year to keep your guitar’s playability in an optimal condition.
How do I know if my truss rod is maxed out?
It can be near impossible to tell visually if your truss rod has no more give, but ultimately if you’re turning the rod and feeling a lot of tension, that’s your guitar telling you to stop and take it to a luthier. Some necks need more than a truss rod adjustment to get straight, and it’s important to know when to stop.
Can a truss rod break?
A truss rod can break if too much attention is applied – so it’s wise to always adjust your truss rod in small increments, check the effect, and then adjust again – and to realize when the rod is maxed out.
How do I know if my truss rod is broken?
If the truss rod won’t move in either direction, or if turning it has no effect, or if it’s just sitting there rattling away like it’s attached to nothing – your truss rod is likely broken. Take the guitar to your luthier to discuss.
Can you replace a truss rod?
You can replace a broken of malfunctioning truss rod, but it involves removing the fretboard from your guitar, and as such can be an extremely expensive repair. More common would be to simply install a new neck.
Conclusion
The basic function of a truss rod helps to keep your neck from having too much (or too little) bow in it. That being said, it’s important to have a good understanding on how they work, and having it adjusted properly can make a huge difference in the overall playability.
While performing these adjustments on your own may seem to be a daunting task, it really isn’t as hard as you may think. By taking a few simple steps and precautions, you can easily get it set to the spot where it’s best for your needs, and you’ll also be able to make changes as needed to keep it in top-top shape.