Whether you own a lower-line guitar or a jaw-dropping boutique build, there is no excuse to put off cleaning and maintenance. It’s unquestionably essential.
Cleaning your acoustic is not just about conserving its aesthetic appeal. Reguarly cleaning your acoustic guitar will result in a better tone and improve the longevity of the components. It’s also essential to get rid of the muck build-up on the fingerboard. Now, that’s a step up in tone and improved playability.
A good cleaning routine involves three important tasks:
- Cleaning the fretboard
- Cleaning the strings
- Cleaning the body
We are dealing with two divergent materials – a) wood or laminate and b) metal. The fingerboard, bridge, and guitar body of a guitar are made from solid or layered wood. Guitar strings, tuning machines, and frets are made from metal. They need to be treated differently (more on strings here).
In this post, we’ll look at all the steps involved alongside some exemplary products that make the process more effective and convenient.
Contents
Step by step guide to cleaning your acoustic guitar
Step One: Prepare your cleaning station.
As a rule of thumb, make it a point to clean the guitar every time you change the strings (check out our guide to the best acoustic guitar strings for our recommendations). Removing the guitar strings gives you full and convenient access to hard-to-reach nooks are corners. That’s where the grime and dust accumulate the most.
Always wash your hands and dust the surface before you begin. Gather your tools and set up your station in a well-lit space, preferably dust-free. You can place the guitar in your lap as long as you don’t put any undue pressure on the neck. I prefer to do it on a workbench or desk laid out with a foam mat and neck block.
A neck block or neck support is essentially a cradle/pillow that supports the neck. It can be handy for cleaning, but it’s equally useful for setups, adjustments, and string changing. The Flatsons Mat and Kit combo is worth considering if you want the extra convenience and comfort.
Step Two: Clean the fretboard
The fingerboard or fretboard is typically maple, rosewood, pau ferro, or ebony. Guitar manufacturers use unsealed and unfinished wood, so it is a little more exposed to the elements and prone to dry out.
First, you want to clean up the muck. The muck is a mixture of dirt, sweat, and dead skin transferred from your fingers and the environment. Use a credit card or thin razor to scrape it off gently. Brush off the grime and clean the fretboard with a cloth.
You can go a step further and condition it with a fretboard oil such as Jim Dunlop Lemon Oil or D’Addario Hydrate. You only need a few drops, so a $5 bottle will last for a year or more. You don’t need to condition your fingerboard more than twice or thrice a year.
It’s a remedial measure for fretboards that are prone to cracks. Most manufacturers recommend using natural oils to rehydrate the fingerboard wood once every six months. You can, however, wax your guitar as often as you want with Jim Dunlop 65 Spray Wax. Waxing is usually an aesthetic pursuit, it will eventually wipe off.
Step Three: Clean or change the guitar strings
Unsurprisingly, clean strings sound drastically better than grime-coated ones. Professionals have the liberty to change their strings before every gig. We’ll have to contend with milking the most tone out of every acoustic guitar string set.
While we do have a full article on cleaning guitar strings, the simplest way to do it is to use a cotton swab or cleaning cloth. Wipe the strings with a cleaning cloth after every session of play to maintain them. You can also splurge on a nifty clamp-style string/fretboard cleaner.
However, if you’ve been putting off cleaning the strings for a while, they can turn black with grime. Such strings will sound dull and listless. They need to be deep cleaned, or worse yet, replaced. For deep cleaning (or to remove build-up), any form of isopropyl rubbing alcohol and a cleaning cloth will restore the tone and sparkle.
The Fender Speed Slick or GHS Fast Fret can be a suitable choice. If the strings as too far gone, you should swap them with a good long-lasting set such as the Martin Lifespan 2.0 or Elixir Nanoweb acoustic guitar strings.
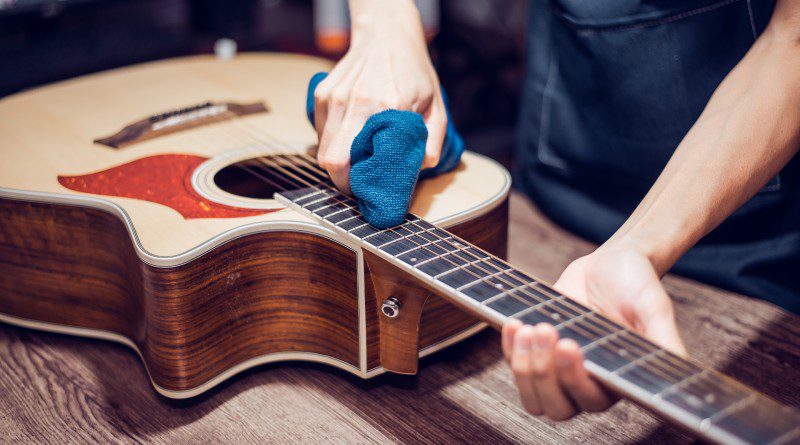
Step Four: Clean and polish the body
An acoustic guitar can either have a matte/satin, or a lacquered/gloss finish. Some finish options, such as Shellac (French Polish) are used in boutique and premium guitars. Shellac is highly susceptible to scratches. Nitrocellulose lacquer and gloss are hard-wearing and scratch-resistant.
Again, a microfiber cloth is essential to prevent scratches. Do not use polish on a satin finish, and always check if the product is nitrocellulose safe. If you can’t figure it out, try the polish on a small area on the back of the guitar as a ‘patch test’.
You’ll find endless options when you search for a cleaning agent or guitar polish. They essentially do the same thing. I vouch for a ‘care-kit’ to bypass the hassles of sourcing items individually. The MusicNomad MN108 or Jim Dunlop System 65 are my top recommendations.
Do you need a microfiber cloths to clean a guitar?
We’ve all tried using random rags to polish our acoustic. They can do a decent job, but you might encounter threads getting stuck in the headstock, under fret edges, or at other sharp joints. They also leave a fine layer of lint – dust-like bits of threading all over the body.
It’s best to get a dedicated polish cloth designed to clean acoustic instruments. Firstly, it won’t scratch or damage the guitar finish. Second, they don’t shed, so you won’t have any lint sticking to your oily, freshly polished guitar.
A dedicated microfiber cleaning cloth is an inexpensive one-time investment. Buy one and store it in your guitar case, viola! The Music Nomad Edgeless Microfiber guitar cleaning cloth works well. Although, any equivalent from Ernie Ball, D’Addario, or Fender will do.
Final Thoughts:
I hope this post has provided all the requisite information (and encouragement) to keep your guitar tidy and efficient. Grubby acoustics might look good in an old-school blues music video, but that’s about it.
There are only two things to do. Build a handy go-to cleaning kit (or buy a full guitar cleaning kit) and form the habit of wiping your instrument after each session of play/practice. I strongly advise against using household cleaners or soap water to clean a guitar.
Many of them have chemicals that can degrade the instrument. You never know how the finish will react. Luckily, there are plenty of dedicated and inexpensive cleaning kits available. It really shouldn’t be a problem.