The structural integrity of a guitar largely depends on the condition of its neck. The neck’s alignment affects both playability and tone, making the early detection and repair of any neck warps incredibly important.
Back bow and up bow on a guitar’s neck can be tricky enough to deal with, and they’re only bending on one plane. So, what happens when the neck of a guitar is both twisted and bowed? This is called a warped neck, and it’s one of the most difficult repair jobs of all on a guitar.
The biggest concern with a warped neck is that the string action, or the distance between the strings and the fretboard becomes inconsistent, leading to playability issues, and potentially even unrepairable intonation problems. Not only that, an uncorrected warped neck can lead to increased stress on the guitar, causing further damage over time, perhaps even leading to a full break of the neck or heel pocket.
In this KillerGuitarRigs Guide, we’ll be teaching you all about warped necks, including how they happen, whether they can be fixed, and the steps to repairing a guitar with a warped neck. If you’re suffering from a warped neck yourself, or you’re just curious to learn more, you won’t want to miss this one!
Contents
- What is a Warped Guitar Neck?
- Can a Warped Guitar Neck be Fixed?
- Identifying a Bowed or Warped Neck
- Causes of a Warped Neck
- What are the Symptoms of a Warped Neck?
- The Nature of Twisted Necks
- How to Fix a Warped Guitar Neck
- Non Invasive Neck Warp Repair
- Permanent Neck Warp Repair
- Other Methods to Fix a Warped Neck
- When To Seek Professional Help
- Final Thoughts on Repairing a Warped Guitar Neck
What is a Warped Guitar Neck?

A warped guitar neck is one that has twisted, making one side of the fretboard lower than the other. This can be a huge issue, and will cause a number of problems from inaccurate intonation, all the way through to severe tuning issues and a complete lack of playability.
Can a Warped Guitar Neck be Fixed?
Warped guitar necks can be fixed, although those with the most severe twisting may not be repairable. This kind of job is typically best left to professional luthiers, but if the warp is only slight, you might be able to save quite a bit of money by attempting the repair yourself.
Identifying a Bowed or Warped Neck
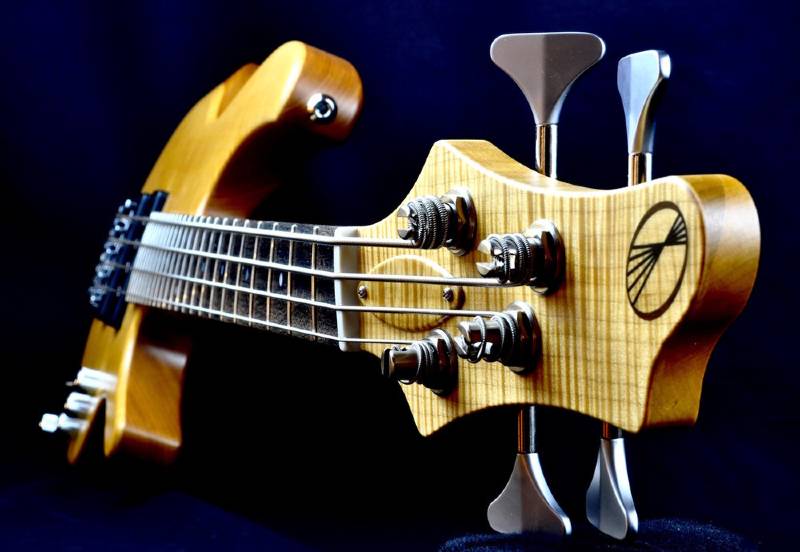
Identifying a warped guitar neck requires a keen eye and an understanding of the types of warping and bowing that could occur.
An up bow is where the neck bows away from the strings, a back bow is where it bows towards the strings, and warping is where the neck twists along its length.
Each type affects the guitar’s playability differently. An up bow might cause buzzing at higher frets, while a back bow can raise the action to an uncomfortably high point. You’ll probably feel a warp, or notice issues with your tuning or intonation before you actually see it, as they usually start out small. If this is the case you’ll need to perform a visual inspection to confirm both the extent, and direction of the twist.
By looking down the neck from the headstock towards the body or vice versa, you should quickly be able to see whether you have issues with the straightness of the neck. It’s usually a bit easier to spot on fretboards with big radii, but it still shouldn’t be too hard even with a smaller radius. You can also measure the action at various frets along the length of the neck to determine if the neck is warped (we’ve included full instructions below!).
In all cases, early detection is absolutely critical for preventing further damage and maintaining the guitar’s playability.
Causes of a Warped Neck
Because guitar necks are generally made from wood, they’re susceptible to damage from a number of sources, including impact, temperature, and humidity changes, and this is before factoring in the potential issues posed by the huge amount of tension they’re under from the strings.
Improper Storage
Storing a guitar in an unsuitable environment, like a damp basement or a hot attic, can lead to warping. Even storing it close to a window in your home where the guitar could come into contact with direct sunlight could potentially cause dangerous temperature fluctuations that lead to neck warps.
Physical Damage
Neck warps can also be caused by physical damage. If you happen to drop or bump your guitar in the wrong way, or worse, something falls on it and doesn’t get picked up while it’s in storage, this could be a potential cause of a twist in the neck.
Poor Craftsmanship
In some cases, a neck warm just isn’t your fault. Guitars can come from the factory with warped necks, or they can develop quickly after getting them home and playing them. Makers with poor quality control standards often neglect to properly inspect guitar necks for twists before boxing them up, and a slight warp can become a very noticeable one before the guitar winds up in your hands.
Lack of Maintenance
Guitar ownership is a little like car ownership. Changing the strings isn’t always enough. You need to keep an eye out for twists and warps regularly. One of the most easily avoidable mistakes is leaving a guitar in storage with broken strings. Your guitar is designed to deal with the tension of all six strings evenly, but if you allow it to sit with uneven tension for an extended period, particularly if it’s in an unsuitable environment, you’re just asking for a twist to develop.
Never leave your guitar without all six strings for an extended period, and make a point of inspecting your guitar every time you change the strings.
String Tension
Especially with older guitars, and those without adjustable truss rods, the tension of the strings is a major cause of neck warping. The average guitar has about 160lb of string tension on it at all times, which as you can imagine, causes a lot of strain, particularly on older necks. The natural way the grain of the wood is formed may cause it to twist under this tension over time, and this can be accelerated if the strings are over tightened, or too heavy a gauge is used.
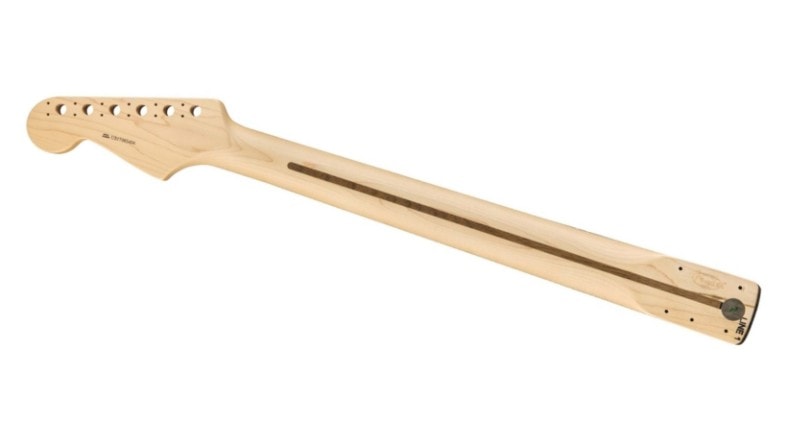
Broken Truss Rod
The truss rod is responsible for countering the string tension, and with most modern guitars, is adjustable, allowing players to set how much neck relief they want to customize the playability of the guitar. If the truss rod is broken, this will allow the string tension to go unchecked, and can result in twisted and warped necks.
Incorrect Humidity
Because most guitars are made from wood, which is a natural product, they are susceptible to expansion and contraction caused by changes in humidity. In environments with excessive humidity, the wood fibers may absorb some of the moisture from the air, causing them to swell, and this can result in unnatural twisting and warping of the neck.
Temperature Fluctuations
Similarly to humidity changes, wood will also expand and contract with changes in temperature. If your guitar goes from an extreme cold environment to a hot one, this can trigger thermal expansion, which again, can cause many issues with the guitar, with warped necks being amongst the worst results.
Time
Sadly, as a combination of all the above, even if you look after your guitar perfectly throughout its entire life, the neck may end up warping. Of course, proper care and attention will mitigate the severity, but because the majority of guitars are made with natural products like wood, warping may be inevitable.
What are the Symptoms of a Warped Neck?
If your guitar has a warped neck, there’s a few things you might notice. The first symptoms are likely going to rear their heads as playability issues. You may find that notes choke out when bending where they didn’t before, and it’s almost a certainty that you’ll find issues with your intonation.
Besides that, if the warp is severe enough, you may even notice a difference in the feel of your neck. As Ben at Crimson guitars points out, this might not always be a bad thing, but the chances of your neck twisting in such a way that the intonation and tuning weren’t impacted, but the feel and playability were improved are pretty slim.
You might also find that the action of the guitar is affected. A warp would likely cause uneven action height, which would be extremely detrimental to your playability.
The Nature of Twisted Necks
While a twisted neck is generally seen as a defect, in some (very rare) cases, it can actually improve the guitar’s playability. This can happen with a mild warp because each string vibrates on its own plane, and so a slight twist in the neck might not significantly affect the action or intonation of each string.
Of course, the degree to which a twist can be considered a positive is highly subjective, varies from guitar to guitar, and is something you shouldn’t ever try to instigate.
In most cases, a twisted neck will absolutely need intervention. As we’ve discussed, it can lead to uneven fret wear, difficulty in playing, and inconsistencies in the action and intonation.
Guitar necks are generally made of hard woods that are picked for their rigidity and resistance to warping, but the construction of the neck, including how many pieces it’s made from, and the wood species it comes from can also play a big part in how easily it twists when exposed to the conditions that can cause warping.
How to Fix a Warped Guitar Neck
Fixing a warped guitar neck is one of the trickier tasks in all of lutherie, and as such, if you’re not confident, or you’re dealing with a guitar that has either real monetary or sentimental value, you may want to consult with a professional before tackling this kind of project yourself.
These repair suggestions are primarily aimed at guitars with set necks. This kind of repair on a bolt on neck will almost certainly result in damage to the neck pocket, which will render the guitar practically useless.
Bear in mind, however, that neck warp repairs are never guaranteed to work, and you may find that the twist comes back. If you’re really sure you want to do this yourself, we’ve laid out the entire process step by step below.
Inspect the Damage
Before jumping into a repair, take some time to properly inspect the damage to see just how bad it is. There are a couple of ways to do this:
Visual Inspection
The easiest, and most obvious way to check if a guitar neck is warped is to just look at it. Flip the guitar so you’re looking straight down the neck from the body end towards the headstock – if there’s anything more than a slight warp, you’ll be able to see it pretty clearly. To be doubly sure, flip the guitar around and look from the headstock towards the body.
Feeler Gauges
If a visual inspection isn’t coming up with any obvious twisting, but you still feel something isn’t right, you’ll probably need to break out the feeler gauges.
Put a capo on the first fret, and using your finger, fret the string at the 17th. Then, using a 0.010” gauge, slide it between the fret and strings at the top, middle, and bottom of the fretboard at both the treble and bass sides.
Without going into granular detail about the distances you should encounter, you’re really checking to see that there isn’t a huge difference between the string clearance from the 1st string to the 6th. If the feeler gauge is tight on one side, and really loose on the other, you’ve got yourself a warped neck.
Non Invasive Neck Warp Repair
If you do have a warp, but you find that it’s very slight, you might want to think about a more non-invasive approach to repair.
Custom String Gauges
One of the cheapest, easiest, and least invasive approaches to neck warp repair is to use a custom string gauge.
This might involve buying individual strings, or combining different sets, but the aim is to increase tension on the low side of the warp, and decrease it on the high side. If the warp is twisting down towards the treble side, consider a heavier gauge for your 1, 2, and 3 strings, and use lighter strings for the 4, 5, and 6. This may help to balance the tension, and resolve the warp.
Using Your Truss Rod to Fix the Warp
The truss rod is literally the backbone of the guitar’s neck. Its primary job is to maintain the straightness of the neck by counteracting the tension of the strings and environmental influences on the wood, and because it can be adjusted, it can also be used to try and correct minor twisting and unwanted bowing.
Caution must always be exercised when adjusting the truss rod, though. Over adjustments can cause severe, and potentially irreparable damage to the neck. When you’re making adjustments to the neck with the truss rod you need to turn the key in small increments, over a reasonable period of time in order to allow the fibers of the wood to adjust to the change in tension.
It’s also important to understand the limitations of warp repair with truss rod adjustments. Yes, it can be effective for correcting certain types of minor warping, but the truss rod is not a guaranteed fix. If you aren’t sure what you’re doing, seek professional help before breaking out the truss rod wrench.
Permanent Neck Warp Repair
If you’re dealing with a warp on a guitar like a Strat, a Tele, or anything else with a bolt on neck, you might want to just consider a straight replacement. However, if you’re trying to fix something like an SG or a Les Paul with a set neck, a permanent repair might be your only shot at salvaging the guitar depending on how severe the twist is.
Heat Treatment as a Solution
Heat treatment is one of the most common solutions used to correct warped necks, but it comes with significant risks. The process involves applying controlled heat to the neck, which allows the wood fibers to become more pliable, and then using tools and pressure to reshape the neck. This may well save your guitar, but in doing so, you run the risk of causing damage to inlays, binding, frets, and the fretboard – at the end of the day, you’ll need to decide whether these risks are worth the reward.
As mentioned throughout this guide, we should normally be actively trying to avoid exposing the guitar to heat, so while it seems counterintuitive to apply it in a concentrated form, especially knowing that it can cause damage to other components in the process, it might be your best chance at a fix.
Heat treatment is a delicate process that really requires precision, a steady hand, and experience to perform properly. Before attempting this yourself, make sure you have the proper tools, and that you understand that this could cause further permanent damage.
This method is generally not recommended for valuable or vintage guitars and should only be considered as a last resort, however, if you are feeling brave, or you’re just practicing your skills on an old beater guitar, we’ve prepped a full guide to heat treatment repairs below.
Tools You’ll Need
Before getting started on fixing your warped neck, you’ll need to make sure you’ve got all the right tools for the job.
- Clothes iron
- Clamps
- Rubber pads
- A neck cradle
- A tension block
- Eye hooks
- Extra low E string
- Fine chisel
- Paint scraper
- Dead blow mallet
Steps to Fix a Warped Neck
Step 1 – Remove the fretboard
Set your iron as hot as it will go, and turn it to the maximum steam setting. When it’s heated up, you will want to move up and down the fretboard to start loosening the adhesive.
Don’t leave the iron still in one spot for too long otherwise you may end up burning the wood. After about 5 minutes of heating, you should start to see the fretboard come away from the neck. At this point you can take your fine chisel or paint scraper and gently insert it between the fretboard and neck, and carefully start prying the two apart.
If you encounter resistance while prying the fretboard off, you may need to use a dead blow hammer to push it through. Be sure to lift the fretboard away in equal measure from the top, middle and bottom to prevent snapping it. Take your time, and do not rush this stage.
When the fretboard is all the way off, you can proceed to step 2. Note, it’s not uncommon to start encountering fret sprout while removing a fretboard. If you have a bound fretboard, this may cause some finish damage, and regardless, will also likely result in you needing a fret dress once the neck is straight again.
Step 2 – Secure the Guitar
Before going any further, you’ll need to secure your guitar’s body thoroughly to your work bench. There will be torsional forces applied to the neck, and if the body isn’t secure, you may end up making the warp worse, or wasting your time and doing nothing at all.
Lay the guitar down, with the neck supported by the cradle right around the middle. Place your rubber pads in between the body and the clamps to prevent finish damage. Then, tighten the clamps until the guitar is properly secured, and cannot move in any direction.
Step 3 – Prepare the Tension Block
Take your tension block, which should be a solid piece of hard wood like oak or mahogany, and at a headstock’s width distance, screw in your two eye hooks. The tension block should then either be screwed or bolted into your work bench with the eye hooks lined up with the 3 and 5 position tuning pegs on a 3 x 3 headstock, or right around the middle of the headstock on a 6 in line.
Step 4 – Attach the Strings
Take one of the low e strings, and secure it to the 2nd string tuning peg, and then take the other string, and attach it to the 5th string peg. You’ll need to then secure each string to the respective eye hook.
Before putting the strings under tension, slot additional rubber pads in between the strings and the headstock to prevent any damage.
Step 5 – Tighten the strings
Turn each tuning peg until both strings are taught. At this point you’ll want to take your iron, again with the high steam setting, and heat up the neck. As the neck heats up, you’ll need to tighten the string on the high side of the warp.
Use quarter turns, and go very slowly to allow the wood to acclimatize, and also to prevent any catastrophic damage. After each turn, visually inspect the neck to see if it’s any closer to being straight again.
When the neck has been pulled straight, heat it up to set the lay. Keep it under the same tension for a minimum of 24 hours, but be sure to check on it regularly throughout this period. If the strings stretch from the tension, you may need to add an extra partial turn to maintain the shape.
Step 6 – Release the Tension
Once you’re satisfied with the way the neck is looking, very slowly release the string tension. If you release too fast, the neck might spring back to a warped condition. If all has worked as planned, the neck should be straight now.
Step 7 – Reattach the Fretboard
The last step is to reattach the fretboard. You’ll need to properly glue it down, and hold it with clamps for 24-48 hours to cure (or whatever the glue manufacturer’s instructions say). When the fretboard is reattached, restring, and your guitar (in theory) should once again be playable.
Before calling it a day, use your feeler gauges and once again check the distance between the frets and strings at the top, middle, and bottom to assess whether your repairs did the trick.
Other Methods to Fix a Warped Neck
In more severe cases of warping, even more invasive methods like removing and replaning the fretboard may be necessary. This process involves detaching the fretboard from the neck, planing the neck to achieve the correct curvature, and then reattaching the fretboard. While effective, this method is complex and risky, potentially altering the guitar’s feel.
Another method involves adding or removing material from the neck, but this too is a delicate process that can affect the instrument’s structural integrity.
It’s important to note that some neck repair methods provide only temporary relief from warping. The natural characteristics of wood mean that the neck may eventually return to its warped state, especially if the underlying causes, like environmental conditions or string tension, are not addressed.
When To Seek Professional Help
If you’re anything like the KGR team, you might have something of an ambitious take on realizing the limits of your skill sets when it comes to repairs and DIY, which is why it’s always a good idea to think about enlisting the help of a pro if you’re ever unsure. If you start thinking to yourself that you might need a luthier’s help, that’s a good sign that you actually do!
Complex repairs, like correcting a severely warped or twisted neck, often require specialized tools that the vast majority guitarists just don’t have, and skills and techniques that are well beyond the abilities of the average hobbyist, too. A professional luthier or guitar tech will be able to do a better job of assessing the extent of the damage and determine the most appropriate course of action, whether it’s a truss rod adjustment or change of strings, or, more invasive procedures like heat treatment or fretboard planing.
With a professional repair job you’re also likely to get some kind of guarantee for at least a short time on the quality of the repair should the same issue reoccur, and if they damage your guitar during the process, there’s a good chance they’ll cover the cost of a replacement.
If you’re going to the trouble of getting professional help, trust their judgment. There might be some sticker shock, but remember that the skills they have (that you need) didn’t just appear out of nowhere, and you’re paying for that knowledge as well as the actual repair work.
Final Thoughts on Repairing a Warped Guitar Neck
As mentioned, repairing a warped guitar neck (if it involves more than a change of string gauge), is a pretty serious task. If you’re just learning about lutherie, we highly suggest either taking on some additional projects first, or perhaps seeing if you can get a scrap or donor guitar to practice on before tackling your own.
As always, if you’re not sure, please take your guitar to a professional. The thought of a repair bill might be terrifying, but it’s never going to be as bad as having to scrap the whole guitar.