One of the greatest things about playing the guitar, or any musical instrument for that matter, is how much of a creative outlet it can be. Playing music allows us to express ourselves, and show off our individuality. One thing that can be a real drain on individuality, however, is having an acoustic guitar that looks the same as everyone else’s.
Unlike electric guitars, acoustics tend to have a relatively uniform look, which can make it hard to stand out in a crowd if that’s your thing. Fortunately, customizing your acoustic guitar with a bespoke paint job is much easier than you might think.
In this KillerGuitarRigs Guide, we’ll be going through the entire process of painting your acoustic guitar. From the supplies and equipment you’ll need, through to a step by step guide on how to get the finish just right.
If you’ve been thinking of refinishing your acoustic guitar with a custom paint job, you’ll definitely want to keep on reading.
Contents
Can I Paint my Acoustic Guitar?

If you’ve been wondering whether you can paint an acoustic guitar, you’ll be pleased to know that not only is it possible, it’s also quite straightforward. Unless your acoustic guitar is made from some kind of polymer, like on an Ovation, you should have no problem painting it.
Does Painting an Acoustic Guitar Affect its Tone?
Painting your acoustic guitar will most likely reduce the sustain and resonance of a guitar. How much impact your paint job has will come down to a few factors, including how many layers of paint you use, what kind of paint you use, and what type of clear coat you use.
Remember, the finish the guitar left the factory with was professionally applied using carefully selected chemical products that optimize the performance of the guitar while still providing protection.
If you do choose to paint your guitar, the thinner the paint layer, the less impact it will have on the tone. When painting your acoustic guitar, aim to get away with as few layers of paint as is possible. Using spray paint or an air brush will allow you to get the thinnest, most even coating possible.
What Supplies and Equipment do I Need to Paint an Acoustic Guitar?
Before getting started in painting your acoustic guitar you should gather everything you’ll need for the entire task. Painting a guitar can be a time sensitive task, and should you need to run out to get something, or even order it from the internet mid way through, you could ruin an entire step, or even the whole paint job.
To paint your acoustic guitar you’ll need the following.
Equipment
- Safety Glasses/Goggles – These glasses will protect your eyes from injuries caused by dust during sanding, and from paint overspray while painting.
- Respirator – While painting, aerosolized paint can present a serious health risk, even if you’re spraying outdoors. Reduce the risk with a respirator.
- Craft Knife – You’ll need a craft knife or some other sharp, fine blade in order to properly apply your masking tape.
- Paint Sprayer Gun (optional) – If you’re looking for the very best finish possible, using a spray gun rather than cans of spray paint will get you those results. Not essential – but a definite nice to have!
- Microfiber Cloths – You will need microfiber cloths for cleaning the body of the guitar before painting begins.
- Something to Hang the Guitar From – To get the best results, it’s best to suspend your guitar from above. This will allow you 360 access to the entire body so you can cover all areas without having to physically handle, and potentially smudge the paint.
Supplies
- Paint – Paint is the first and most obvious thing you’ll need. You will need to decide exactly which type of paint you want to use. There are several kinds commonly used for painting guitars, each with benefits and drawbacks.
- Acrylic – Acrylic paint is extremely affordable, it’s available in practically every color imaginable, and each layer only takes around 2 hours to dry. If you’re looking to complete your paint job quickly, this is a great option
- Nitrocellulose Lacquer – Nitro lacquer is associated with high end finishes. It delivers a gorgeous, breathable finish that will age beautifully, and really allow the guitar’s true tones to be heard. The downside is that each layer takes approximately 10-14 days to cure. With a minimum of 4 layers, this could mean your project takes upwards of 3 months to complete.
- Polyurethane – Poly finishes are extremely common on guitars today. Polyurethane lacquer provides an extremely hard, durable finish that won’t change over time. It takes about 2 to 3 days for each coat to dry properly, so while it takes longer than acrylic, it’s a much shorter process than using nitro.
- Clearcoat – Once your final layer of paint is cured, you’ll need to protect it using a quality clearcoat. Not only will it preserve the new finish of your guitar, it will protect other things in your house from paint scruffs if you place your guitar on them.
- Sandpaper – You will need a lot of sand paper. First for taking off the old clear coat on your guitar, and also for sanding down each layer of new paint you add. We recommend having both 600 and 1200 grit.
- Denatured Alcohol (Methylated Spirits) – You’ll need denatured alcohol to clean down the guitar body before sanding. This is a chemical that won’t break down the existing lacquer, but will easily remove dirt and grime.
- Painter’s Tape – Buy the best painters tape you can afford. Good quality tape will prevent bleed through, and will help you to get a pro looking finish.
- Wax Paper – A roll of wax paper will make it easy to cover large areas you don’t want to paint like the fret board without having to use tape over the entire space. If you don’t have or can’t find wax paper, old newspaper will do.
- Tack Cloth – A tack cloth is a rag that has been impregnated with beeswax. You will use this to dab the surface after each coat has dried in order to remove fine dust and debris before spraying the next layer.
How to Paint an Acoustic Guitar (Guide)

Step 1 – Organizing:
The first thing to do is gather all of your supplies and equipment. Take inventory and ensure that you have everything you need. If not, now is a great time to head out to the store, or to place your online order for anything you’re missing.
Step 2 – Cleaning:
Once you have everything, it’s time to get started. Before sanding off the old finish, put some denatured alcohol on a microfiber cloth and thoroughly clean the entire surface of the guitar, front, back, and sides. This will help to ensure that you don’t end up rubbing dirt into the grain of the wood during sanding.
Step 3 – Masking Off:
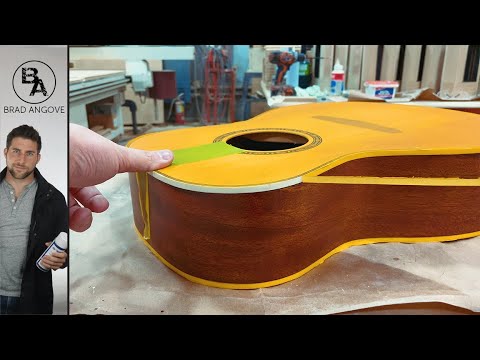
After you’re satisfied that the guitar has been properly cleaned, go ahead and start taping off any areas that you don’t want to paint. Make sure to get a good seal with the masking tape, particularly on the border areas of the areas to be painted and those to be left alone.
Wrap any large areas, like the neck, fretboard and headstock in your wax paper or newspaper and seal tightly with masking tape. If you have a pickguard we recommend taping this off completely, and tracing around the outside of it with your craft knife.
Place wax paper or newspaper inside the soundhole and tape into place to prevent paint spray from getting inside the body of the guitar.
Step 4 – Sanding:
Now that everything is properly masked off, you’re safe to start sanding. Starting with your 600 grit paper, sand with the grain over every area that you want to paint. Don’t push too hard, as the aim is just to remove the clearcoat – you don’t want to lose any of the wood surface.
After you’re done with the 600, go back over the surface with the 1200 grit. This will make sure that the surface is as smooth as possible for painting.
Step 4 – Dusting:
Sanding is messy work – you should now take a fresh microfiber cloth and dust down the entire body before dabbing it all over with the tack cloth.
Step 5 – Hanging:
If possible hang the guitar by the headstock so that you can work around the entire body of the instrument.
Step 6 – Painting/Curing/Sanding
You’re now ready to paint! Using extremely short, light strokes at a distance of 12-20 inches, spray the entire surface you want to paint. Make your sweeps left and right, ensuring you get every nook and cranny.
After your first paint layer is done, leave it to cure. The cure time will vary depending on the paint type you chose, but it’s vital not to rush this. If the paint isn’t properly cured, the results will look amateur at best.
Once the paint has fully cured, take some 1200 grit sandpaper and lightly sand the entire painted surface. Dust it off, hit it with the tack cloth, and repeat.
You should aim for between 4 and 6 layers of paint, depending on the color, your desired finish, and of course the paint manufacturer’s recommendations
Step 7 – Clearcoat:
After achieving your desired look paint-wise, it’s time for clearcoat. In the same manner as you did with the paint, spray a very light coat of the clear lacquer over the whole surface. Once each layer is dry, sand the surface with your 1200 grit sandpaper, dust it off, and then add your next clearcoat layer.
You should aim for 4 even layers of clearcoat. After the last layer is dry, we recommend leaving the guitar for a minimum of 2 weeks to allow everything to cure properly before playing.
Final Thoughts on Painting an Acoustic Guitar
Painting an acoustic guitar might not be a particularly common thing, but if you’re looking to stand out from the crowd, it’s a great way to make your instrument truly your own. We’d really recommend doing this only if you’re really sure you want to permanently alter the appearance and potentially the performance of your guitar, and that you’re not painting a guitar of any significant value.