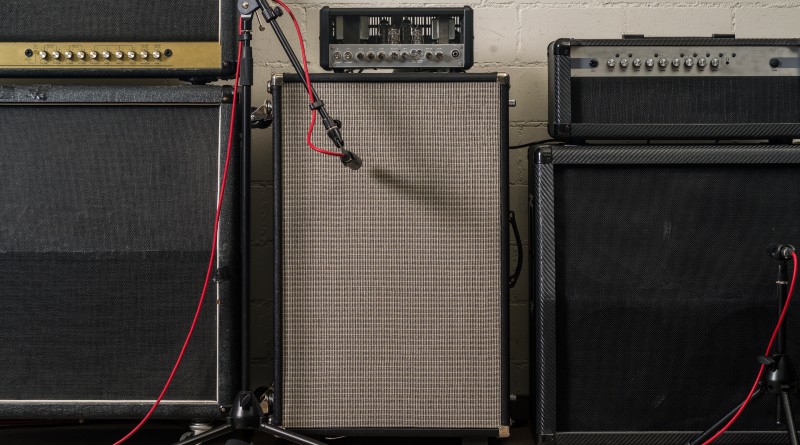
Building a custom guitar amplifier cabinet is one of the many ways to customize your gear and sound. In addition to being one of the cheapest and easiest custom builds in the world of guitars and equipment, it’s actually one of the most rewarding.
An amp cabinet is so much more than a box for the amplifier and speakers – these cabinets assist in the shaping of the sound and the overall response of the amp and speakers. It’s also arguably an easier job that building your own guitar.
In this KillerGuitarRigs guide you’ll learn
- What Wood Should You Use To Build A Guitar Amp Cabinet?
- Should You Make Your Guitar Cabinet Open Back Or Closed Back?
- What Supplies and Tools Will You Need?
- How to Build a Guitar Amp Cabinet?
Interested in guitar speakers?
Check out our full rundown of the best guitar speakers.
Contents
- What Wood Should You Use To Build A Guitar Amp Cabinet?
- Should You Make Your Guitar Cabinet Open Back Or Closed Back?
- What Supplies and Tools Will You Need to Build a Guitar Amp Cabinet?
- How to Build a Guitar Amp Cabinet?
- Step 1 – Cut Outer Box to Size
- Step 2 – Construct the Outer Box
- Step 3 – Prepare the Baffle
- Step 4 – Prepare the Electronics Hardware
- Step 5 – Spray Paint the Inside and Back of the Box
- Step 6 – Install the Speaker and Electrical Hardware
- Step 7 – Apply the Tolex
- Step 8 – Prepare and Install the Grille Cloth
- Step 9 – Install Corner Protectors and Handle
- Final Thoughts on Building A Guitar Amp Cabinet
What Wood Should You Use To Build A Guitar Amp Cabinet?
The vast majority of guitar amp cabinets are built from some type of wood, whether solid, plywood, or even fiberboard. But not all types of wood are well suited to use in amplifier cabinets. Perhaps not to the extent that tonewoods matter to a guitar, but the wood selection for an amp cabinet must meet certain criteria.
First, it needs to be strong enough to withstand some abuse – guitarists don’t tend to baby their amplifiers the way they do their guitars. At the same time, the wood needs to be relatively lightweight so that it isn’t too difficult to move around.
When Leo Fender first started making amplifiers, he was using solid pine. Pine is lightweight, sturdy, and flexible. It responds well to use as an amp cabinet wood, and still sees use to this day. Amp cabs made from plywood tend to be made from birch ply. Birch ply has no air gaps, it is completely sealed, and is exceptionally strong. Alternatively, MDF, or medium density fiberboard is also frequently used. MDF is a mixture of sawdust and glue, and the resulting product is extremely rigid, and relatively lightweight.
Should You Make Your Guitar Cabinet Open Back Or Closed Back?

Before getting started with your amp cab built, you will need to know whether you’re going to go with an open back or a closed back design.
Open Back
As should be obvious from their name, open back cabinets have an opening on the back. Because of this, the sound energy from the speakers is not trapped, and escapes the confines of the cab. This ultimately results in a richer, more resonant sound. They are mostly found on combo amps, but open back speaker cabinets are not unheard of.
Closed Back
Closed back guitar amp cabinets are opposite to open back in that they have a panel that seals the cabinet cavity from the back. Because they have a panel at the back, they trap the sound energy that is lost out of the back on open cabinets, which is what gives them a tight, focused, punchy quality. Sound tends to be more directional, too. These are all characteristics favored by sound engineers, too, as it makes isolation of sound sources much easier.
Open Back Vs. Closed Back – Which is Best?
There is no right answer here! It very much depends on what you are looking for from your sound. If you prefer a more ambient, open sound, go with open back. If you need a tight, driving sound, you might find that a closed back is best for you. Do bear in mind that due to the additional factors involved with pressure build up on the cabinet, it is more complicated to construct a closed back version, which is why we will focus on the open back type in this particular guide.
What Supplies and Tools Will You Need to Build a Guitar Amp Cabinet?
In order to build your cabinet, you will need:
- Pine boards of sufficient length and width for the top and sides
- Flush fit screws
- Wood glue
- Spray adhesive
- Speaker grille cloth
- Tolex
- Impact driver
- Router
- Jigsaw
- Hand saw or Circular saw
- Corner Protectors
- Handles
How to Build a Guitar Amp Cabinet?

Step 1 – Cut Outer Box to Size
Once you’ve selected the type of wood you intend to use, cut the sides, top and bottom to the size of your choosing. Ensure that the sides are identical in length to each other, and that the top and bottom are also identical.
Step 2 – Construct the Outer Box
Set up the base and sides facing your work bench on their edges until they form a U shape. Ensure that the sides sit on top of the base, not to the sides of it. Apply wood glue to the areas that will join and screw together. Next, glue the exposed edges of the sides at the top end, take the cabinet top, put it in position, and screw it securely. You should now have your outer sides prepared.
Step 3 – Prepare the Baffle
The baffle is the wooden board that the speaker will sit in. In order to attach it to the cabinet housing you will need to prepare a frame that sits inside of the outer box. Take a tape measure and get the inside dimensions of the cabinet outer box.
Cut the frame out of 2×4 wood to meet the required dimensions and screw it into the inside of the outer box, recessed back around 2 x the depth of the wood you are using for the baffle. Remember always screw from the outside in!
Cut your baffle board to size, remembering to use the inside dimensions of the outer box. Find the dead center of the board by drawing a X from corner to corner. Depending on the size of speaker you plan to use, you’ll need to use a router to cut a circular hole in the baffle to accommodate the horn.
Once the baffle is ready, position it against the frame you prepared and screw it securely down.
Step 4 – Prepare the Electronics Hardware
To provide a stable place from which to run the power cord, input jack, and any other electrical or electronic items you’ll need to prepare a rear panel. This panel should be about ¼ of the height of the box.
But first, you’ll need to prepare an inner frame for it. As you did for the baffle, using the inside measurements, cut out from 2×4 a frame that spans the width of the cabinet, but around ¼ of the height. Recess it exactly the depth of the rear panel and secure with screws.
Cut out your panel and secure to the frame you just made. It should sit flush with the outer box. Drill holes to accommodate the jack and the power cord
Step 5 – Spray Paint the Inside and Back of the Box
In order to keep everything looking nice when you’re done, you should paint the inside of the empty cabinet and the rear electronics panel. Spray paint is fast and provides a quality finish, although any paint will work. Black is the recommended color, but again, this is a personal choice.
Step 6 – Install the Speaker and Electrical Hardware
When any paint you’ve applied is dry, position the speaker inside the hole you prepared in the baffle, and using a pencil mark the positions of the mounting points. Drill holes large enough for the shafts of the securing bolts, but not large enough to give them room to move and rattle. Once the holes are ready, hold the speaker to them, and install using the provided hardware.
Run the wires from the speaker to the holes you have prepared and connect them to the electrical hardware in the rear panel.
Step 7 – Apply the Tolex
To apply the Tolex, cut a length sufficient to wrap the sides, top and bottom in one sheet. Apply a thin veneer of glue to the entire outer surface of the top and sides of the cabinet (spray adhesive works very well). Take the center of the Tolex you’ve cut and line it with the center of the cabinet top, gently drape it over, making sure to squeeze out any air bubbles. Leave for around 2 hours so the glue can set, then turn the box upside down, apply glue to the entire bottom, and wrap the Tolex around.
Pulling the Tolex fabric taught, fold over any cut edges and staple them to the bottom of the cabinet.
Next, glue the front and rear edges, then wrap the Tolex around. On the back, tuck any excess into the cabinet cavity and staple down. On the front, tuck the edges into the recessed area you left and staple.
Step 8 – Prepare and Install the Grille Cloth
Take another piece of wood the same depth as you used for the baffle board and cut it around 2mm shorter on all 4 sides. This time, instead of cutting out a circle, you will be cutting out a square, with the end result looking something like a picture frame. Take your grille cloth material and pull it taught around the frame you’ve just made, stapling it into position on the back side.
Place the grille cloth frame into the cabinet recess, and screw in securely from the rear. Be careful to select a screw long enough to go through the baffle board and into the cloth frame without poking out of the front.
Step 9 – Install Corner Protectors and Handle
Place your corner protectors into position and secure with screws. The corner protectors on the base will act as feet. Measure for center and place the top handle into position before securely screwing it down.
Final Thoughts on Building A Guitar Amp Cabinet
For simplicity, in this guide we described the process to build a cabinet for a single speaker. If you are looking to get more adventurous with multiple speakers, the same principles still apply, but on a larger scale. The world is your oyster when it comes to custom cabinet builds. You can select your own colors, coatings, speakers, wiring, and more.