From George Harrison’s Rocky, to Jimi Hendrix’s Monterrey Strat and Eric Clapton’s “The Fool”, some of the most iconic electric guitars in history have had home made paint jobs. Painting your electric guitar can be a great way to customize it to your look, or even just refinish it if you’re not into the road worn vibe.
Fortunately, electric guitars are much easier to refinish than their acoustic counterparts, especially those with bolt on necks. Because electric guitars mostly rely on their pickups for their tonal properties, you don’t need to be quite so delicate with the finish.
In this KillerGuitarRigs Guide, we’ll be covering the process from start to finish for painting an electric guitar, including all the supplies and equipment you’ll need, as well as all of the steps to completing the job. We’ve made it easy to follow, no matter your experience level, and have also included multiple techniques, even going so far as to show you how to set up your own paint booth to help you get the exact finish you’re looking for.
If you’re planning to paint your electric guitar, you won’t want to miss this guide!
Contents
- Can I Paint an Electric Guitar?
- Do I need to remove the Old Paint Before Painting my Electric Guitar?
- How to Paint an Electric Guitar
- Priming the Body
- Prepping For Paint
- Apply the Clear Coat
- Polishing and Buffing
- Troubleshooting Paint Drips and Imperfections
- Patience and Timing
- Final Thoughts on Painting your Electric Guitar
Can I Paint an Electric Guitar?
Yes, you can paint an electric guitar. Not only is it possible to paint your electric guitar, but the process is extremely simple, and extremely rewarding. Painting your electric guitar will make it a truly custom, one of a kind instrument, and might even strengthen your connection with it.
Do I need to remove the Old Paint Before Painting my Electric Guitar?
You will need to take your electric guitar back to bare wood before painting it if you want truly professional results. If you paint on top of the existing finish, the new paint won’t adhere properly, and if it even dries at all, it will peel off very quickly.
How to Paint an Electric Guitar
As with any project, it’s a must to have all of the equipment and supplies you need before you even think about getting started. Having everything to hand will prevent incidents down the line caused by not having the right gear at the exact right time.
Painting a guitar requires a certain level of precision, and if your timing is off, it can ruin the entire finish, and may even cause you to have to start over!
These are the items you’ll need to add to your shopping list before painting your electric guitar:
Tools and Supplies
Prepping your tools and materials is an essential step before you start painting. Once you start, you’ll be fully committed to the process, and if you’re missing any of the supplies you need at a crucial time, you risk ruining your work and having to start over.
For painting an electric guitar, you’ll need some high quality primer, colored paint, and clear coat. Typically, one can of primer, three cans of color, and two cans of clear coat should suffice for a standard job. Additionally, you’ll need various grits of sandpaper for prepping and finishing, a tack cloth for removing dust, quality masking tape, and paper for covering areas you don’t want to be painted. Don’t forget wood filler or spackle for filling any imperfections, and of course, be sure to get the appropriate safety equipment, including gloves, a respirator, and safety goggles.
We’ve prepared a more comprehensive list below:
- Orbital Sanding Tool
- Dremel or other Rotary Tool
- Compressed Air Paint Gun (Optional)
- Primer
- Spray Paint
- Clear Coat
- Grain Filler
- Shielding Tape
- Sandpaper
- Tack Cloths
- Painter’s Tape
- Wax Paper
- Screwdrivers
- Electric Buffer
- Polish
- Synthetic Wire Wool
- Nitrile gloves
- Cartridge respirator
- Safety goggles
Optional: Set Up a Custom Paint Booth
If you want the best possible finish, setting up a DIY paint booth is the way to go. Not only will it prevent overspray damaging anything else you own, but it can also help you to prevent contaminants like dust or even bugs landing on, and ruining your finish while the paint is still wet.
To make a paint booth, choose a well ventilated area, with plenty of space to work in. Pick up some heavy duty plastic sheeting from your local hardware store, and lay one sheet on the floor, then hang 4 sheets around the work area in a square pattern to create walls and use tape to seal the gaps where the sheets meet. Next, using a craft knife or box cutter, cut a vertical slit into one of the sheets big enough for you to get in and out of.
Be sure to set up a fan inside the booth to keep air moving and cycle fresh air into the space. One more thing you should set up is adequate lighting. We’d recommend investing in 2 or 3 LED painter’s lights that you can point at the guitar from different angles to kill shadows and give you the best possible view of the finish as you’re applying it.
Step 1: Gather Your Tools and Equipment
Before getting started, take stock of all your supplies and equipment. Be sure you have everything in place or in a known location. If you need additional supplies get them before starting. If you have paint, or any other consumable already, ask yourself whether you have enough? Is there a possibility you need more? It’s always better to have something and not need it, than to need it and not have it.
Step 2: Break Down the Guitar
The first thing you’ll need to do is disassemble your guitar. This involves removing the strings, in the case of guitars with bolt on necks, you’ll need to remove the whole neck, you will also need to take off the pickguard, remove the electronics, and any hardware attached to the body.
Step 3: Remove the Old Finish
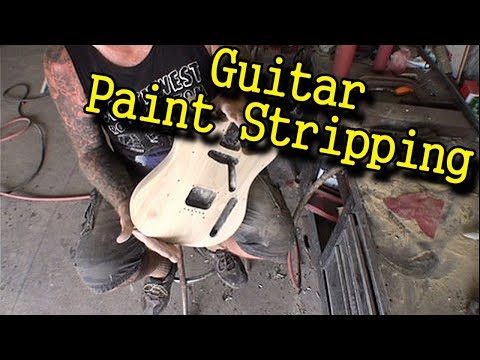
Once your guitar is all broken down, with the neck off, or in the case of set neck models with the neck protected, you can start to remove the original finish. This is messy work, so be sure you’re in a well ventilated space, and you’re wearing your eye and respiratory protection.
Before you start sanding, be aware that the aim is to get back to bare wood and no further. Too much pressure will result in the loss of body material, and you want to avoid altering the shape of the guitar, particularly where there are carves and cutaways involved.
Using a low grit on your electric sander, methodically remove the top coat and the paint from the body until you’re back at bare wood. When all of the flat surfaces are bare, use your rotary tool to remove any remaining finish from nooks and crevices, like the electronics routing, for example.
If any areas can’t be easily sanded using the tool, take some sandpaper and go over those areas by hand.
When the whole body is bare, go back over it with a finer sandpaper grit, between 800 and 1000 should be fine. The aim is to leave a slightly rough surface that the paint can properly adhere to.
When you’re happy that the guitar is fully stripped, you can move to the next step.
Step 4: Get Ready to Paint
If you deem it necessary, use your wood grain filler at this stage, you’ll need to sand one more time afterwards to ensure a flat surface.
As mentioned, the prep stage is extremely messy. If you’re not painting in a different location entirely, be sure that all, or as much as is possible, of the dust and debris from the old finish is removed from the work space. This dust can give you a lumpy, amateur looking finish.
Cleaning the wood surface is another important step. Oils from your hands may have contaminated the wood, and these oils can interfere with the curing of the paint, or even leave dark spots. Give the entire body a thorough rub down with mineral spirits.
If possible, hang your guitar body for easy access to every angle. This will speed up the process significantly and result in a more even finish as you won’t need to wait for one side to dry so you can flip it and do the other side.
Priming the Body
If you’re looking for a translucent finish, you can skip the primer stage, but if you’re looking for a perfect solid finish, then you’ll need to start with primer.
Priming your guitar correctly is the key to getting a smooth, even base for your paint. Don’t cheap out on the primer – use a high quality product, and check to make sure it’s compatible with the paint you’ve chosen.
A nice, thick layer of primer will help you to fill in any pores or imperfections you missed during the prep stage, or if you didn’t use wood filler, resulting in a smoother finish.
Using short, purposeful strokes, spray your primer on in a horizontal left to right, right to left pattern. Keep the spray nozzle around 8 to 10 inches from the body to ensure a wide, but dense coverage. Ensure that you perform a double pass across the entire surface.
Allow the primer to dry for at least 2 hours, and lightly sand the body with 1000+ grit sandpaper. You should be aiming to roughen the surface, and not strip through the layer you just applied. Add a second layer of primer, sand and assess – if the wood grain still shows through, you may need to add a third coat. After your last primer coating, sand the surface one last time and clean up with your tack cloth.
Prepping For Paint
The painting stage requires precision and patience. Before getting started, give your paint time to come up to room temperature to ensure optimal flow through the nozzle. If the cans are cold, warm them up in warm water. If you’ve previously used the same spray cans, be sure that the nozzles are thoroughly cleaned out to prevent misspray.
Before actually starting to apply the paint, you’ll need to decide what kind of finish you’re looking for. If you’re looking for translucent, how see-through do you want it to be? With each coat of paint, you’ll lose more of the wood grain, but you’ll also gain a much deeper saturation of color.
Paint is applied in a similar manner to the primer. Use short quick strokes, and look for a 50% overlap on each pass for best results. Let each coat dry fully before lightly sanding, tacking, and moving on to the next coat. We’d suggest waiting at least an hour past the manufacturer’s suggested drying time for each layer to ensure it’s properly cured.
You’ll need multiple coats to achieve a deep, even color. Remember, applying several thin coats is preferable to spraying on one or two thick ones as they’ll dry faster, be less likely to run, and will ultimately give you a smoother and more professional looking finish.
When you’re satisfied with how the paint is looking, using a minimum of 1200 grit sandpaper, lightly sand the surface, clear away the dust and get ready for your clear coat.
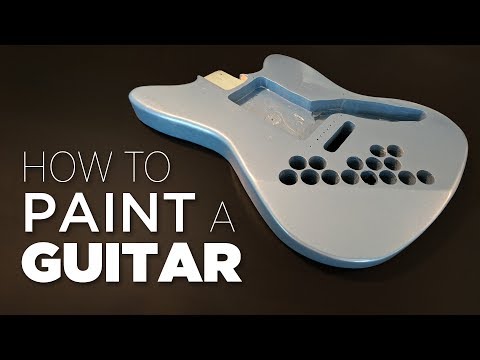
Apply the Clear Coat

The protective clear coat layer is actually the most critical step. This is the stage that takes the longest, so patience is definitely a virtue here. Before applying the clear coat, you’ll want to let the paint properly cure first. We recommend allowing for about two weeks of curing time after the last coat of paint.
Once the paint is cured you can start the clear coat application. You’ll need to apply around 12 to 15 coats to get the best results. If you’re using a poly finish, you can apply a new coat around every 3 hours. Between each coat, gently rough the surface with your synthetic wire wool and apply the next coat. Once you have your final coat applied, do not rough the surface, and allow it to cure for a minimum of 2 weeks.
If you’re using nitro, you’ll be able to apply a maximum of 2 coats a day, although sticking to 1 coat a day will result in a better final finish. With nitro there’s no need to brush up the surface after each coat as the lacquer is able to bind to the previous layer on its own.
The bare minimum time you should allow for curing after the final coat is 4 weeks, but for the very best results (if you have the patience) you’ll want to leave it for about 6 months.
Polishing and Buffing
Regardless of which finish you used, the final step will be to polish the top layer to a glassy shine to get that professional finish. The first thing to do here is to use an extremely high grit sandpaper (approx 3000 grit) to level sand the surface.
Once the entire surface is flat and level, dab it with the tack cloth. Take your preferred polish or buffing compound, and apply a small amount onto the surface of the guitar. You can buff by hand, but we’d recommend using an orbital buffer for the best results.
One thing to note is that during this stage, your glossy paint finish will take on a cloudy appearance at first, but after a few rounds of polishing, it will return to a clear, swirl free finish.
When you’re happy with the level of polish you’ve achieved, you can start to reassemble the guitar. Be sure to use painters tape to avoid scratches from errant screwdrivers if necessary!
Troubleshooting Paint Drips and Imperfections
It’s inevitable that paint drips and imperfections can occur, especially if this is your first time painting a guitar, but if you take the right approach, they won’t completely ruin your project.
If you do end up with paint runs or drips, let the paint dry completely before addressing them. Once the top layer is completely dry, gently sand the area with 3000 sandpaper until the drip is removed – be careful not to sand through to the primer, or down to bare wood. After sanding, clean the area thoroughly with tack cloth to remove any dust or debris.
Next, reapply paint and clear coat as needed, following the same techniques as before. We’d suggest a layer over the area you repaired, followed by a full coat.
If you come across any other imperfections like dust nibs or orange peel, the fix should be the same as it was for drips – sand, then reapply.
Remember, fixing these issues requires patience and a steady hand. Don’t wait until the end of the process to address paint imperfections – if you find any drips on any layer, whether at the priming or painting stage, address them then and there to prevent those issues from carrying over.
Patience and Timing
There’s one thing that ruins more guitar paint jobs than anything else, and that’s impatience. Getting a professional quality finish is almost entirely down to taking your time, giving each coat the proper time to cure, and being meticulous when it comes to sanding and buffing.
Rushing at any stage will almost always lead to a disappointing finish, which will either leave you with poor results, or end up costing you time and money in the event you decide to strip down the guitar and start over. Remember, the time and effort invested in painting your guitar directly reflect in the quality of your guitar’s new finish.
Final Thoughts on Painting your Electric Guitar
Painting an electric guitar is always a ton of fun, and is a project that just about anybody can take on by themselves. The most important thing to note is that it takes patience. Don’t rush the steps, and more importantly don’t skip any.
Getting professional results is surprisingly easy if you’re methodical about the way you work, and you use the right tools and equipment. If your guitar is valuable sentimentally or otherwise, we recommend perhaps buying a cheap beater guitar to practice on first.